Welke accessoires mogen niet ontbreken in jouw Diamond Painting toolkit?
Diamond Painting is een van de grootste trends in de hobbywereld op dit moment. Het is te vergelijken met schilderen op nummer, maar in plaats van te schilderen, bevestig je honderden gekleurde ‘diamantjes’ op een plakkend canvasdoek, vel of kaart. Als je van plan bent om met deze hobby te beginnen is het natuurlijk handig om te weten wat je precies nodig hebt om een prachtig, glimmend schilderijtje te creëren. Precies! Daarom is dat exact wat wij gaan bespreken, in deze post!
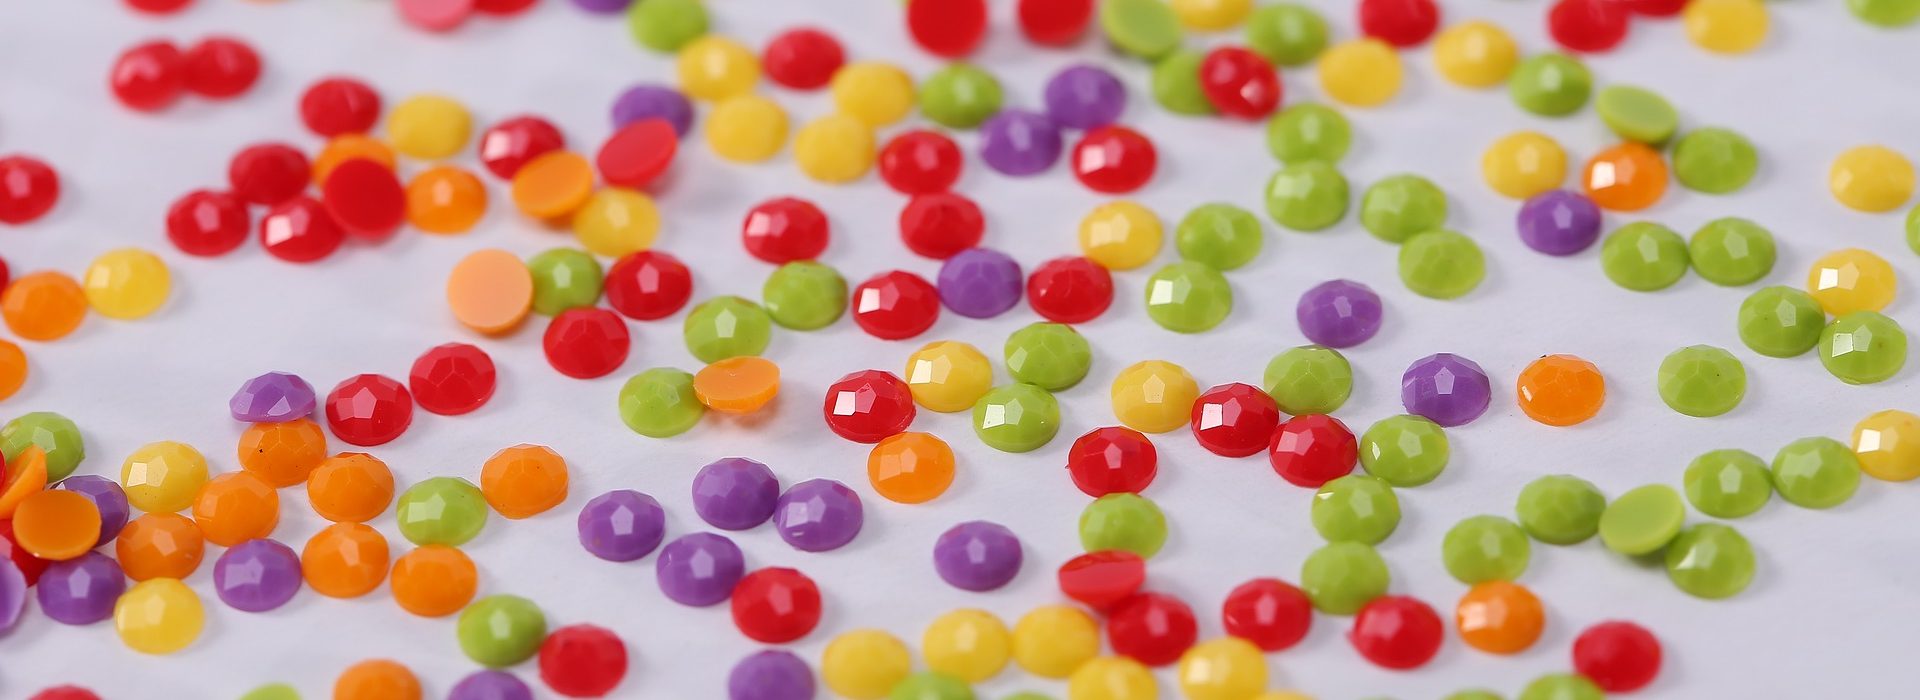
Om te beginnen heb je voor deze hobby heb je natuurlijk ‘iets’ nodig om te painten. Dit is niet écht een tool natuurlijk, maar omdat je zonder niet kan painten, willen we het toch even noemen! In de meeste gevallen zal dit ‘iets’ een (canvas)doek of een vel zijn, maar tegenwoordig zijn er ook veel andere dingen die je van leuke foto’s, of taferelen kunt voorzien, denk bijvoorbeeld aan wenskaarten, sleutelhangers en onderzetters. Wat het ook is dat je wilt gaan painten – voor het gemak gaan we in deze blogpost even uit van een ‘gewone’ painting – één ding staat vast: je kan er zeker van zijn dat er ongelofelijk veel keuze is wat het plaatje (design) op het schilderij betreft. Zoek voor de grap maar eens op Bol.com naar ‘diamond painting‘, en kijk hoe ongelofelijk veel resultaten je krijgt! Keuze te over dus ! Wil je nu overigens meteen een painting aanschaffen en heb je een specifiek onderwerp om te painten in gedachte? Verwerk dat onderwerp dan in je zoekterm op Bol! Ook als je daar bijvoorbeeld zoekt naar ‘diamond painting olifant‘ of ‘diamond painting bloemen‘ krijg je namelijk tot wel honderden resultaten! Het is trouwens ook mogelijk om zélf een diamond painting te ontwerpen, bijvoorbeeld op basis van een mooie foto, van bijvoorbeeld je bruiloft, je kinderen, of je huisdier, maar daarover gaan we het in een andere post nog uitgebreider hebben!
Maar goed, even terug naar waar we waren, de painting die je wilde die is besteld (eigenlijk elke painting op de markt wordt trouwens verkocht inclusief de benodigde steentjes, dus ook dat zit nu goed): wat nu?? Wat is er nu nog meer nodig qua accessoires om jouw (eerste?) diamond painting avontuur tot een succes te maken? In de rest van dit artikel zetten wij kort voor jou op een rijtje welke accessoires er niet mogen ontbreken in jouw Diamond Painting toolkit.
Accessoires voor een basis-toolkit
Een diamond painting pen en was
Allereerst is er natuurlijk de diamond dainting pen en de was die je bij die pen nodig hebt; misschien wel de belangrijkste hulpstukken van de diamond painter. Het is namelijk met deze speciale diamond painting pen en de bijbehorende was dat je de diamantjes oppakt en ze op de juiste plek op het klevende vel of het canvasdoek plaatst. De kop van een diamond painting pen ziet er anders uit dan de kop van een normale pen. Het uiteinde van een diamond painting pen is namelijk niet veel meer dan een klein metalen ‘ pinnetje’. Als je dit pinnetje vervolgens in de was drukt, en vervolgens op een steentje, kan je deze oppakken met je pen. Een klein beetje, licht plakkende was in het puntje van de pen, is namelijk voldoende om de lichte steentjes op te tillen, waarna je ze op het canvas kan plaatsen. Doordat dit canvas veel sterker plakt dan de was, blijven de steentjes vervolgens aan het canvas plakken! Gefeliciteerd, je bent aan het diamond painten.
Zowel een simpele pen als een beetje was (meestal een of twee stukjes), worden vaak meegeleverd als je een diamond painting koopt, hier hoef je dus niet zelf achteraan! Tegenwoordig zijn er echter ook een hele hoop luxere pennen los verkrijgbaar. Dit zijn vaak pennen die fijner vasthouden dan de simpele basispen, of pennen met extra functies, zoals bijvoorbeeld een lampje. Over de verschillende pennen die er zijn, plaatsen we snel nog een artikel!
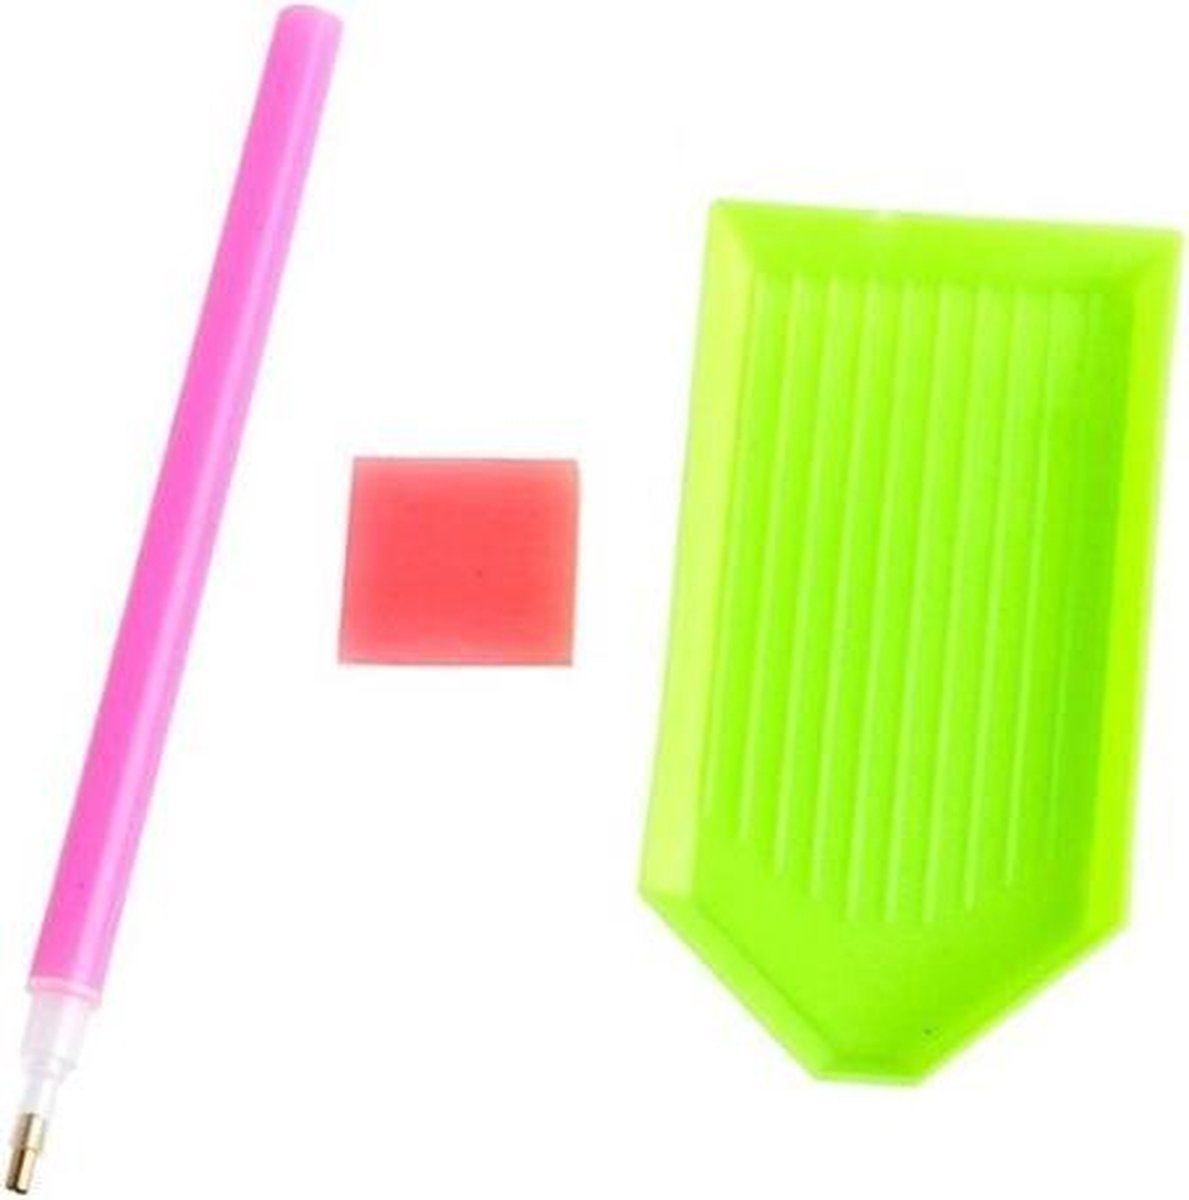
Een schudbakje
Een schudbakje kan je als diamond painter ook écht niet zonder, hoe simpel deze tool eigenlijk ook is. Deze tool heeft twee functies. Door gebruik te maken van een schudbakje, hoef je de kleine steentjes van een bepaalde kleur waar je mee wilt gaan werken, namelijk niet op tafel te leggen. Dit is echt een verademing, want geloof me: op tafel werken is geen optie. Als je dat doet, liggen de steentjes voor je het weet, door je hele huis! Belangrijker dan deze functie, is overigens de ‘keer-en-sorteer’-functie van het bakje. In alle schudbakjes voor diamond painting, zijn namelijk een paar ribbels aangebracht. Deze ribbels hebben als doel om steentjes te helpen kerenn, wanneer je een beetje met het bakje schudt. Met andere woorden: met het schudbakje kan je ervoor zorgen dat steentjes met de juiste kant naar boven komen te liggen, zodat jij ze met je pen op kunt pakken. Ideaal dus! De ribbels in schudbakjes helpen overigens ook om de steentjes goed op een rij te leggen. Dit is ideaal als je bijvoorbeeld met een ‘multi-placer’ werkt (een pen waarmee je meer dan één steentje in één keer op kan pakken, hierover later meer!). Kortom: ook dit is een tool waar je echt niet zonder kunt!
Net als de was en een basispen, wordt een schudbakje meegeleverd met bijna alle paintings die er te koop zijn. Dit is dan eigenlijk altijd een klein, dun groen schudbakje. Er zijn echter ook grotere, en vooral stevigere schudbakjes op de markt. Deze grotere schudbakjes zijn volgens veel ervaren painters een echte musthave. Zo’n groot schudbakje koop je meestal niet los, maar vaak in een set met meer tools.
Een pincet
Een pincet is ook altijd handig om bij je het hebben liggen als je aan het painten bent. Dit kan een pincet zijn die je bij een diamond painting (starters)pakket gekocht hebt, maar ook een gewone huis-tuin-en-keukenpincet. Een pincet gebruik je op de momenten dat er een steentje helaas tóch verkeerd terecht gekomen is en dus verplaatst moet worden. Het kan hier zowel gaan om een steentje dat per ongeluk op een verkeerd vakje terecht gekomen is, als om een steentje dat een beetje schuin is komen te liggen. Als je hier vervolgens met je vinger aan zou gaan pulken, zou het kunnen gebeuren dat je andere steentjes ook losmaakt, of dat de hele boel verschuift. Door een pincet te gebruiken zorg je er dus voor dat je net iets preciezer te werk kan gaan!
Ondanks dat een pincet een tool is waar je ook eigenlijk écht niet zonder kan, wordt deze vaak niet meegeleverd wanneer je een nieuwe painting koopt. Dat is geen ramp, want waarschijnlijk had je al wel een pincet in huis! Zo niet, dan wordt het misschien tijd om eens na te gaan denken over de aanschaf van een wat completer diamond painting pakket. Wat er in zo’n toolkit te vinden is, bespreken we hieronder!
Accessoires voor een complete toolkit:
Als je het mij vraagt, zijn alle tools die we hieronder gaan noemen, óók onmisbaar. Omdat je theoretisch echter zonder kan, noemen we deze tools echter geen basistools meer. Denk je nou dat diamond painten écht jou nieuwe favoriete nieuwe hobby kan gaan worden? In dat geval raden we je alle tools hieronder van harte aan!
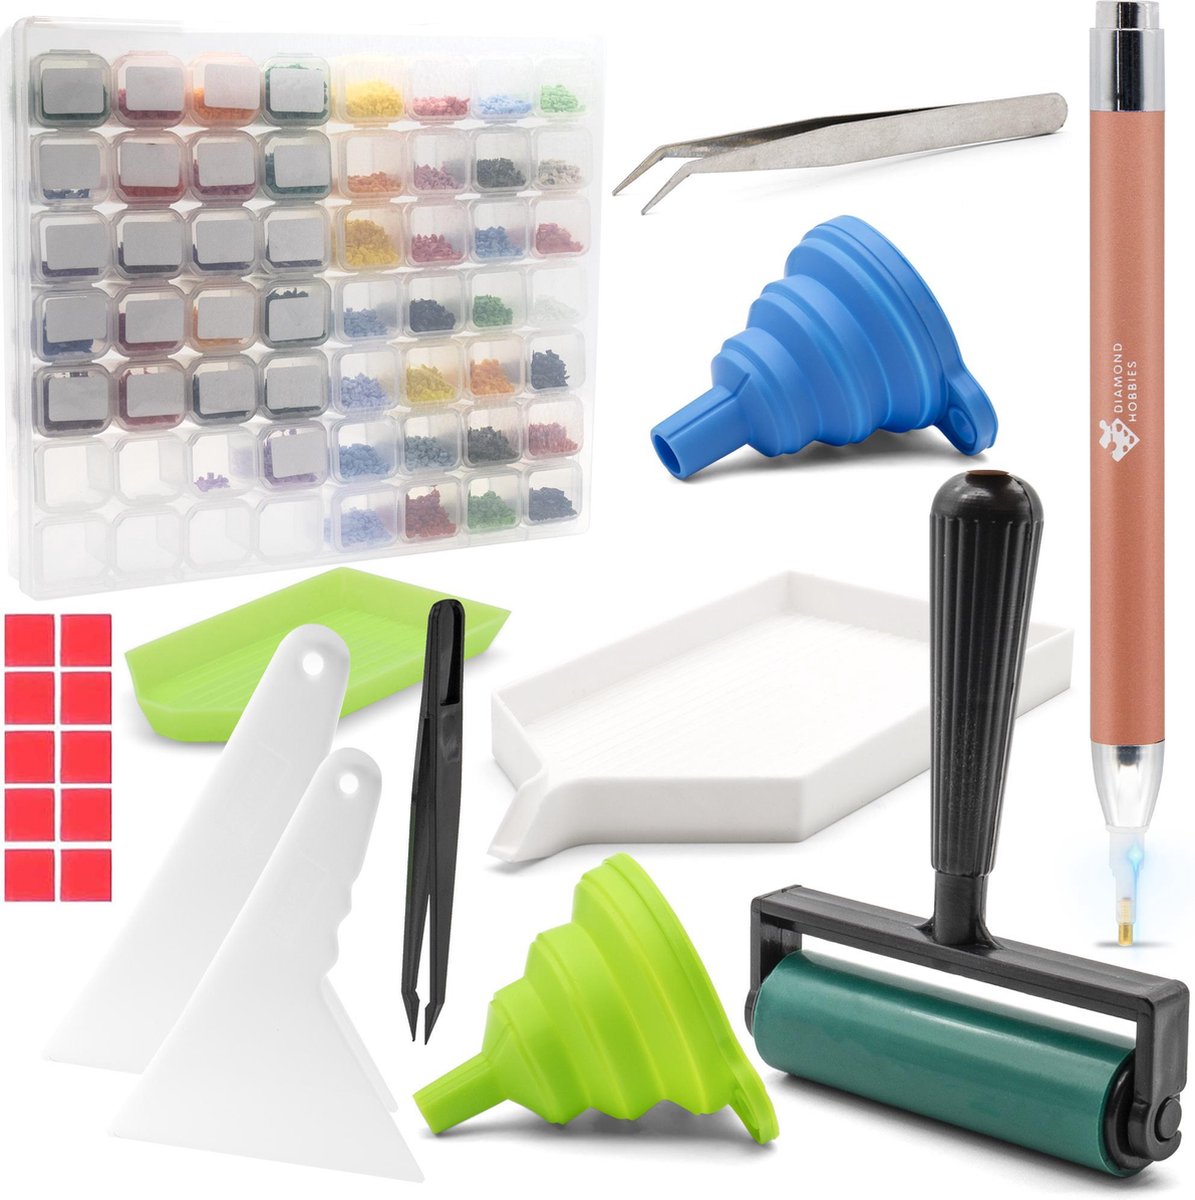
Een sorteerdoos én stickers!
Bij eigenlijk elke diamond painting op de markt, krijg je zakjes bijgeleverd om je steentjes in op te bergen. Ja, handig, maar als je het ons vraagt niet handig genoeg. Deze zakjes zijn namelijk niet alleen klein en onoverzichtelijk, maar ook scheurgevoelig. Verre van ideaal dus. Wil jij je painten naar een iets hoger niveau tillen, maar vooral ook painten met meer comfort en overzicht om het nóg ontspannender te maken? Neem dan een sorteerdoos!
Op sites als Bol.com worden veel sorteerdozen aangeboden, speciaal voor diamond painting, wat erg handig is. Het algehele sorteerdozen aanbod is echter zo groot, dat je soms door de bomen het bos niet meer ziet! In een ander artikel zullen wij over een tijdje ingaan op de voor en nadelen van alle types sorteerdozen die er zijn. Voor nu houden we het bij een lijstje met de verschillende types, en vertellen naar welk type onze voorkeur uitgaat. Zo kan je kiezen uit:
– De klassieke kralendoos (vaak met grote vakken, die vast zitten in de doos)
– De doos met meer dan 60 ‘Tic tac-doosjes’ (met per stuk los te halen doosjes met veel ruimte)
– Dozen met (rond de 30) doosjes die je stuk voor stuk los kunt halen (maar dan meestal met minder ruimte)
– Opbergkoffers met 60 potjes die allemaal afzonderlijk los te halen zijn
– Dozen met 28 of 56 vakjes die per 4 uit de doos te halen zijn, maar wél allemaal afzonderlijk afsluitbaar!

Als je klikt op de bovenstaande beschrijvingen, krijg je een beter idee van de belangrijkste sorteerdozen die er zijn. Verreweg het populairste model op het moment echter, is het laatste type sorteerdoos, die met 28 of 56 vakjes, die los, per 4 uit de doos te halen zijn. De reden dat wij hier zo’n fan van zijn, is omdat dit type doos ruimte biedt voor bijna 60.000 steentjes, (ongeveer 1000 per vakje!) in tot wel 56 verschillende kleuren. En als dat nog niet genoeg is, is hij ook nog eens ongelofelijk klein! Hij is dus makkelijk mee te nemen in een hand- of rugtas, en komt als je hem bestelt, bij de meeste verkopers, gewoon binnen door de brievenbus! En als kers op de taart kan dus niet alleen de buitendoos dicht, maar ook alle afzonderlijke vakjes, welke ook nog eens per vier uit de doos gehaald kunnen worden, wat óók weer handig is. Een set van vier doosjes staat namelijk stabieler op je tafel dan een los doosje (zeker vergeleken met een Tic Tac-doosje!) en is ook nog eens overzichtelijker. Daarnaast worden deze dozen vaak geleverd met perfect passende stickers…
Stickers ja! Nog een accessoire waar de meeste painters echt niet meer zonder kunnen. Hier hoeven we gelukkig echter niet lang over uit te weiden. Stickers dienen er namelijk alleen maar toe, om het sorteren van je steentjes nóg gemakkelijker te maken. Als je namelijk een sorteerdoos gebruikt, dan kan je stickers gebruiken om alle vakjes afzonderlijk te markeren met de fabriekscode van een bepaalde kleur steentje, én het symbooltje dat een bepaalde kleur heeft in een bepaalde painting. En geloof ons: dat is handig. Er zijn namelijk zo veel kleuren steentjes, dat het vaak met het blote oog niet meer te zien is welke kleur je nou moet hebben! Dus stickers? Die heb je gewoon nodig!
Tot zover alle écht belangrijke tools waarvoor iets meer uitleg wel echt handig was. Dan nu de tools die iets minder uitleg behoeven (maar wél echt handig zijn!)
Een diamond painting roller
Als je klaar bent met een diamond painting, dan wil je natuurlijk dat alles er spik en span uit komt te zien en dat er geen steentjes meer ‘uitsteken’ omdat ze net iets minder strak gelegd zijn.Hiervoor biedt een roller uitkomst. Dit is niet veel meer dan een soort kleine deegroller waarmee je na het painten je kunstwerk nog even een paar keer extra glad rolt. Zeker als je je painting ook echt aan de muur wilt hangen is dit een grote aanrader. Er zijn meerdere modellen rollers op de markt, maar tussen de verschillende rollers zit weinig kwaliteitsverschil. Wél vinden sommige mensen houten rollers vaak iets mooier. Deze zijn over het algemeen overigens ook iets duurder

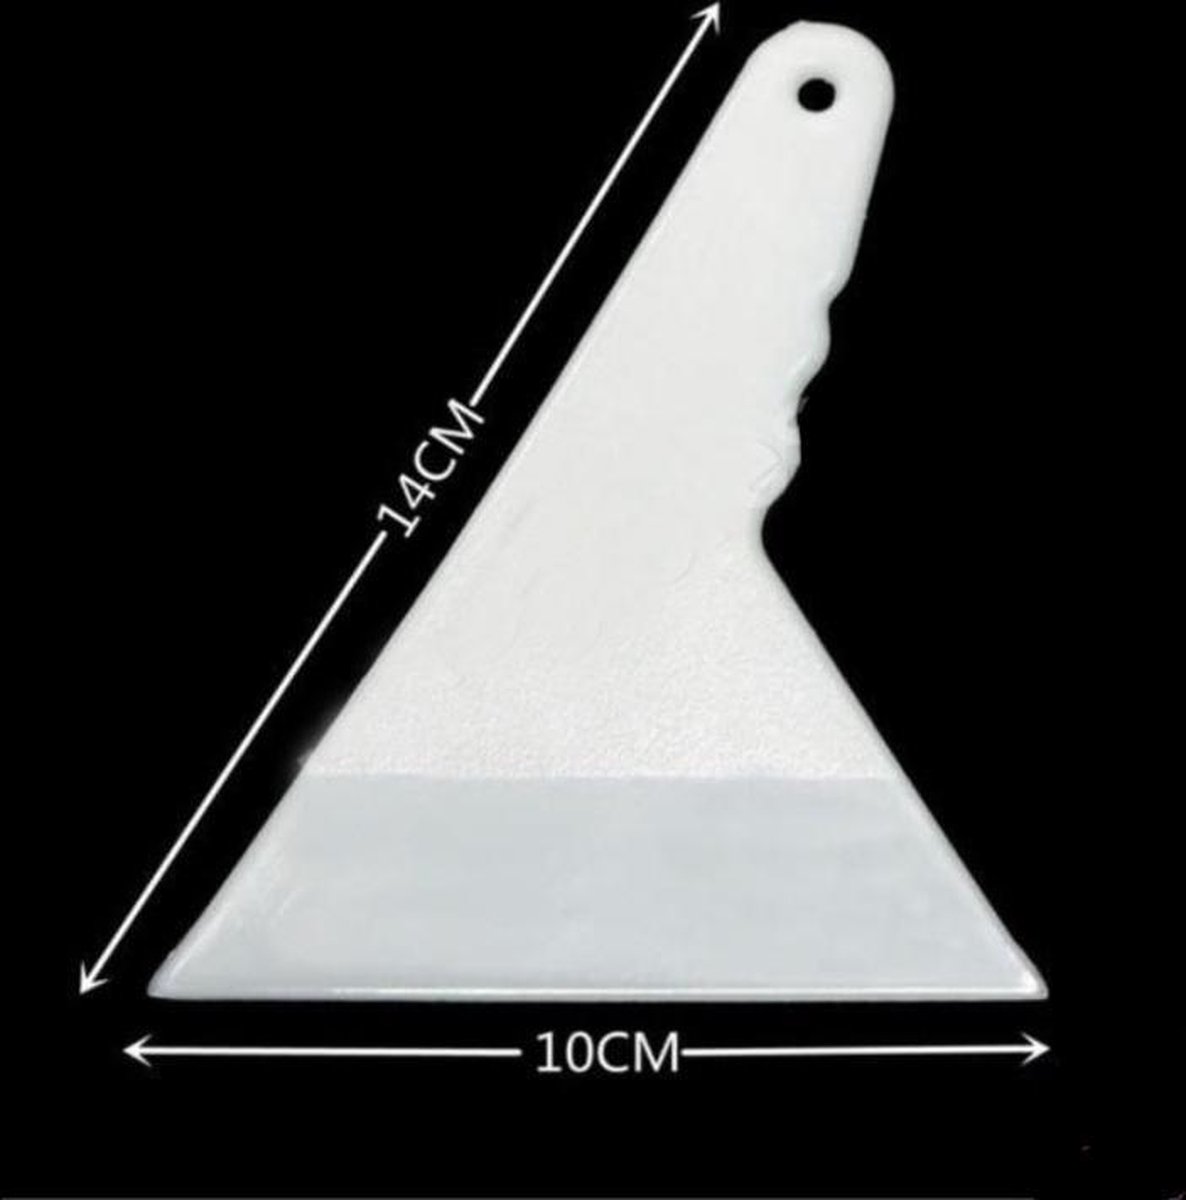
Een corrector
Nee, ik zei niet conrector! Corrector! Dit is een soort mini-ruitenwisser van hard plastic. Dit ‘schuifje’ gebruik je om rijen steentjes aan te drukken en recht te leggen. Ook hiervoor geldt: als je van plan bent je kunstwerk op te gaan hangen: regel er één! Een corrector is namelijk niet duur, maar zorgt er wel voor dat je eindresultaat uiteindelijk veel strakker wordt. Als je in het bezit bent van een corrector maakt het bovendien iets minder uit als je wat minder precies werkt: steentjes in een rij die nét niet perfect leggen kan je hiermee immers toch ‘corrigeren’. Hierdoor hoef je iets minder te priegelen. Dit betekent voor veel mensen overigens ook, dat ze iets sneller kunnen werken, wat ook niet vervelend is. Zeker niet als je je schilderij als cadeautje voor een verjaardag maakt en je niet zo heel veel tijd meer hebt!
Een trechtertje
Kleine trechtertjes – eventueel opvouwbaar – worden door veel diamond painters gebruikt wanneer ze steentjes vanuit een zakje of een sorteerbakje in het schudbakje willen doen. Omdat diamonds ongelofelijk licht en klein zijn, kan je nog wel eens morsen als je zonder trechter te werk gaat. En nee, dit is natuurlijk geen ramp, want bij de meeste paintings worden 30% meer steentjes geleverd dan je uiteindelijk nodig hebt, juist omdat je ze zo makkelijk kwijt kan raken, maar het zorgt er wel voor dat je niet tot het einde der tijden overal in je huist steentjes hebt liggen! Zeker als je kleine kinderen hebt of huisdieren wil je dat nu eenmaal liever niet! Overweeg daarom vooral de aanschaf van een (diamond painting set met een) trechtertje (of gebruik een keukentrechter). Of een trechter opvouwbaar is, of niet, maakt verder niet zoveel uit. Het enige voordeel van opvouwbare trechters, is dat ze iets compacter mee te nemen zijn. Handig dus voor als je bijvoorbeeld op de camping wilt gaan painten!
Andere opzetstukjes voor je pen (óf andere pennen)
Soms – zeker bij grote paintings – wil het nog wel eens voorkomen dat je veel steentjes van dezelfde kleur naast elkaar moet leggen. In zulke gevallen kan het soms handig zijn om te werken met andere kopjes voor op je pen – of gewoon andere pennen. Naast het standaard opzetstuk waarmee je 1 steentje per keer kan plaatsen, zijn er ook opzetstukjes te koop – vaak zitten deze bij een pennenset – waarmee je 3, 6 en 9 steentjes tegelijk kunt plaatsen! Deze kopjes zijn verder ook nog eens verkrijgbaar in meerdere hoeken. Zo kan je zelf kiezen hoe je je pols wilt houden tijdens het painten! In aanvulling op de bovenstaande kopjes is er trouwens ook nog een ‘roller’ of ‘wieltje’. Dit opzetstuk kan je gebruiken als je wel héél veel steentjes in één keer wilt plaatsen, namelijk tot wel 45! Wel moet gezegd dat dit een heel lastig hulpstuk is om te gebruiken; maar weinig painters gebruiken dit. Niet alleen is het namelijk erg lastig om het dubbelzijdige tape dat je nodig hebt om dit hulpstuk te laten werken, los te krijgen en aan te brengen, ook is het heel moeilijk om met dit hulpstuk een écht rechte lijn te leggen. Desalniettemin is dit wel een erg leuk hulpstuk om te hebben en een keertje te proberen!
Wat tips tot slot
Ben je nou tot hier gekomen met lezen? Super! Dan weet je inmiddels welke tools er kunnen zitten in de gereedschapskist van de diamond painter. Of nou ja, gereedschapskist. Een opbergkoffer of tas voor het geheel hebben we natuurlijk nog niet genoemd! Als je ál deze dingen in huis haalt, dan is het immers wel zo handig om ook iets te kopen waar het allemaal inpast! Dit kan je verder het best doen, in een tas die je zelf fijn vindt werken. Veel sets worden overigens geleverd met een bijgeleverd tasje, ook niet onhandig, maar zoek vooral zelf uit wat een fijne opbergmogelijkheid voor jou is, dat is ons advies.
Hopelijk hebben we je met dit stuk een heel eind op weg kunnen helpen als het gaat om de tools die je echt nodig hebt om echt goed voorbereid te diamond painten. Wil je de bovenstaande tools of een aantal ervan nu kopen? Zoek dan vooral eens op Bol.com naar een diamond painting starterset, de meeste sets die je dan zult vinden, die hebben de meeste tools die hierboven genoemd zijn. Wil je een set met álle tools die hierboven genoemd zijn, en ook nog eens geen gewone, maar een lichtpen en reserves van alle kleine hulpstukken? In dat geval kan je altijd kiezen voor onze eigen set. Of je dat doet, laten we volledig aan jou natuurlijk!
Voor nu wensen wij je in ieder geval heel veel oriënteer-, maar vooral ook natuurlijk paintplezier!
En ohja, denk je nou? Huh? Dit stuk gaat helemáál niet over alle tools die er zijn! Waar is de lightpad, waar is meer uitleg over de lichtpen, waar is, waar is? Nou, in dat geval moet je snel maar een keer terugkomen naar deze site, want alle tools gaan hier uiteindelijk besproken worden!
[ssba]
Comments